Mixed Media Art. Photography. Inspiration.

Tuesday, September 28, 2010

Don't Lose Heart : Mixed Media


Don't lose heart.  That's not just the name of this piece, it's also the message that it carries.  (Warning; this post is a bit heavier than normal, but it's what's on my heart)  I created this last week, after a couple of weary weeks.  My baby boy got sick, then I wasn't feeling good for quite a while.  I noticed that there seemed to be tons of people that I cared for, struggling at the same time.  Sickness, pain, loss, and other hardships.  It seemed to all be happening at once.  I couldn't shake off a feeling of heaviness, even after things got better.   After 2 weeks I finally decided to work on an art piece.  I hoped it would help pull me out of this slump, but I knew I wasn't creating this just for me.

Many times I just grab a canvas with no idea where it'll lead me.  Not this time.  This time I received not only the visual of this piece, but also the title before I even started it.  That never happens to me, at least not the title part.  I could never think of good titles for my paintings, hence the brilliant titles "Flowers and Swirls" and "Collage With Blue Flowers" ; )   But this named itself, and seemed to create itself.  I was just the messenger.  It was created for everyone out there going through hard times. Trust that everything will end up OK.  God doesn't put you through anything that you can't handle, so try to have faith and trust that He is taking care of things.  And please, don't lose heart.

This was created on a 5x11 piece of wood with Golden's Light Molding Paste, and acrylic paints.  I added some Glass Bead Gel by Golden, and Gloss Super Heavy Gel by Liquitex to the heart to make it stand out more.  I added an embellishment that I made with copper wire that I bent, then pounded flat.  I attached it with copper tacks to "hold" onto the heart.   

I would like to dedicate this to Manya, Mandy, Kristen, Bev, Boonia V., and anyone else who needs it.  You are loved : )

Also,  I'd like to submit this to Mixed Media Monday (I know, I know, it's no longer Monday.  And I hope this isn't too heavy for my first time participating).  I'll try to lighten thing up next time : )

Esther

Saturday, September 25, 2010

Shadow Shot Sunday : Our Gate


I took these this afternoon of the shadows cast by our front gate.  I was almost laying on my stomach to get a cool angle to make the photos a bit more interesting!


This last one has my husbands silhouette on the right side, isn't he handsome? : )

To join in with your own photos, or to check out more shadowy fun, click here to go over to Hey Harriet's blog for Shadow Shot Sunday.


Thursday, September 23, 2010

Found Art Friday Painting : Change

When I found out Cathy Nichols' theme for this month's Found Art Friday was "Change",  I went blank.  What could I paint that would represent change?  The only thing I could think of was the changing seasons.  Hmm... I could've painted four different trees, one for each season.  No.  I procrastinated, so then I didn't have enough time.  I couldn't think of anything else to represent change, so I finally decided to just start and see where it would lead me. 


I have been wanting to do a striped background, so I started there on a 6"x6" canvas.  I asked a friend for ideas.  She mentioned my "thing" for leaves, and that I could do something about turning over a new leaf.  Wow.  Genius.  That's what I would paint over the background, a turning leaf.  Then my mind slowly started to swim with ideas...change of scenery, direction, heart, pace, mind, etc... Hmm, where were all these ideas last week?  Somewhere in there I saw a street sign in my mind with a U-turn symbol on it.  I decided to go with that, but later changed it from U-turn, to this symbol.  


Not turning back... just changing direction.


A lot of people I know are going through major changes, some intentional, some not.  Some for the better, and some, well...not so much.  This blog has changed things for me quite a bit.  As my husband said "This blog has created a monster".  When I asked him to explain he said "Well, an art monster"!  Ha ha.  How true.  Since starting this blog I've finished more pieces in these past 5-6 months, than I have in the last several years!  It's given me a much needed kick start.

I'm not sure if I started this blog because I was ready for this and already on my way, or this blog is what started all this overflow of creativity.  The chicken or the egg.  Either way, I don't care, I'm just so thankful that this is where I am now.  I can't imagine it being any different.  The challenges I'm taking part in, the other artists I've met, the amazing artwork that's out there inspiring me, it all adds up to me wanting to paint and create non-stop.  What a wonderful and very welcome change.


Sunday, September 19, 2010

Shadow Shot Sunday : Irvine Spectrum


Just a quick post with pictures taken at Irvine Spectrum in So. Cal.  I had posted another picture of these wonderful fabric overhangs in this post here.


Look at the wonderful shadow that it creates.  I love it!  And I love how you can see the clouds better through the fabric.  I'm posting this wonderful shadow so I can join in with Hey Harriet's Shadow Shot Sunday.


To join in or just checkout other cool shadows click on the button below.  Have fun!

Friday, September 17, 2010

Beth's Anthropologie Inspired Triptych


This is the mixed-media triptych that I made for my sister while in Oregon last month.  I started these one day while I was stuck on what to do next on the large swirl painting that I made for her.  She really likes the store Anthropologie, so I wanted to make these look like something you might see hanging in the background in one of their amazing catalogues.

 I found these three thin pieces of plywood in their garage and decided to see what I could do with them.  They all got coated with Golden's Light Molding Paste first.


On this one I dragged an old credit card, that I had cut notches in, down the whole piece.  When it dried I used the same card as a trowel to apply the molding paste through the stencil, to create a raised pattern down the left side.  After it dried I painted it then started adding the embellishments.  I found the stick in their yard, and the piece of wood and a cool rusty eye bolt in their garage.  The blue crocheted circles were cut from an old lace head covering my sister gave to me, and were beige before I painted them.


I glued on this cool lime green fiber ribbon that my sister had just bought, and then wrapped twine around the stick. Then I nailed in copper tacks to have something to wrap copper wire around to anchor down the stick.  I did the same thing to hold the eye bolt to the scrap of wood, then nailed on the crocheted circles.


For this next piece I dragged the notched card through the wet molding paste on the left, and stamped into the rest of it with bubble wrap.  When it dried I troweled through a pretty swirly tree stencil to create the raised pattern.  After I painted it, I found another small wood scrap and a rock and anchored it with the copper tacks and wire.  I also wrapped some twine around it and added the crocheted circle.


I added copper tacks and wire to the bottom for some balance.

On this last piece I drew some lines into the wet paste, then stamped into it with a stamp that I wet first, so it would release easier.  


This was finished similar to the others, with paint, then copper tacks, wire, twine, and a crocheted circle.


The three pieces are made to hang separately, but I thought they might also look nice if they were mounted all together onto a larger piece of wood like in this picture below.


Hmm...I do really like that idea too....might just have to scrounge up some more wood to make more...


Wednesday, September 15, 2010

Guess What? E Makes Jewelry Too!


So I mentioned in the last post that I was up to something different lately...well here it is...jewelry!!  Not really different for me, but different for all of you who only know me for my artwork and photography in blogland.  I used to make jewelry years ago, and took tons of classes at different bead shops, but I put it aside for quite a while.


I wanted to concentrate on my artwork, and my baby, among other things. I knew that when I finally brought out my tools and jewels (hey that'd be a cute business name!)  that I would easily get sucked back in, so I avoided it so I wouldn't scatter my energy.

So guess what happened?  Yup.  Exactly that!  A friend of mine asked me to make a necklace for a gift she needed, so I happily dug out my stash (which is VERY disorganized at this moment...argh) and found all kinds of wonderful, half done pieces while I was searching for a certain bead for my friend's necklace. 

This copper necklace was one of those unfinished beauties.  The chain was almost done, all it needed was to be joined with a clasp (and I had one that I already made just laying around!) and some kind of pendant.  I joined the front with a "s" link and found a beautiful ceramic pendant that I had bought for myself years ago.  I love it, it's by Marsha Neal.  I added the pendant then made a little dangle to hang over the top to help bring out the green.  I also added a cute little dangle to hang from the back too.  I love my new necklace, especially since I've been wearing the same old one over and over.  It was time for a new one!


This necklace and earring set below is the one I made for a friend.  Very simple and elegant and it goes with everything.  I had made a necklace just like it years ago and someone in a store bought it right off of my neck!  I always wanted to make another one but I never did till now.  I love the main white bead and the gunmetal chain.


So now all I want to do is work on jewelry, and I will continue to do so, but I also need to get some more unfinished art pieces done.  Ahh!!  But it's a good problem to have, I love creating.  Just wish I had more time....but don't we all.


So I had been trying to figure out how and when I was going to introduce you guys to my jewelry making side, and well, I guess this is it!  These necklaces are just a tiny sample of what I make.  I LOVE working with metal and wire.  I will be showing you more, but I'm not sure when.  I have so many supplies that need to get used and sold one of these days along with my artwork, so I think I'll have to start looking into setting up a "store", probably on Etsy.  No promises as to when because things are a bit hectic right now, and I want to build up inventory first, but if any one's interested let me know.  And if anyone has any advice I will gladly take that too!


I do have some artwork to show you, but it's taking me FOREVER to go through the pictures...darn perfectionist nature's got a hold of me!


Saturday, September 11, 2010

Playground Shadows

I took these photos of fun shadows several months back while at a park in Fullerton with my husband and son. I loved the zig-zag shadows from the railing on the red stairs.


And look at this pattern below, isn't it great?


These are for Hey Harriet's Shadow Shot Sunday.  To join in the fun yourself, or at least see some other great shadows, click on the button below.


And sorry I haven't been around this week, I needed some rest.  I have been working on something different this week though, and I'll let you in on it as soon as I finish up and take some photos.

Sunday, September 5, 2010

Sidewalk Shadows in Portland


Here are more photos of shadows from my visit to Portland, OR.  a few weeks back.  I know I've already mentioned it(and this won't be the last time either), but I LOVE long shadows.


This last one is kind of a self-portait.  See my weird long shadow coming up the center?  Is that what I look like?   Look how tiny my head is! : )  How funny.  Anyway, these are for Shadow Shot Sunday.  To check out other shadows or to participate click on the button below.  Enjoy!


Saturday, September 4, 2010

Mixed-Media Painting: Lavender and Blossoms


I've had some ideas for paintings like this swimming around in my head for a while, and for some reason I haven't made one until now.  But when I've thought of doing such paintings, the color purple or lavender was definitely NOT on my mind.

 I wanted to make something for the final week of Louise Gale's Creative Color Challenge, but I was intimidated when I learned that the color was lavender.  I love lavender plants, I think they are beautiful and smell fantastic,  but it is not a color that I normally use in my artwork.  I guess that's why it's called a challenge : )


I started by plastering the top 2/3's of a 6 1/4" x 11 1/4" wood board with Golden' light molding paste, using an old credit card as my "trowel".   I used the same technique to smear Golden's crackle paste (love!) to the bottom 1/3.  While still wet I drew the design into it with a pencil, and used the credit card to create the straight lines.


When dry I painted the lavender background.  Originally this piece was only going to be lavender and white, but I remembered that for this week's challenge we could add any of the past challenge colors, so I added a soft sea green and some raspberry red.


On the bottom right corner I added a small square of silver leaf torn from a Japanese washi paper.  Once it dried overnight, I sealed it with a matt sealer and then antiqued it lightly with a raw umber glaze.  I did this to bring out the cracks and grooves a bit more, and make the colors not quite as "bubble gum".  The camera (or photographer ;) ), was having trouble capturing the true colors, but this is close enough.  They are a bit more "dirty" in person.


So what I thought was going to be a project that I would want to give to the nearest passerby once done, ended up being one of my favorites!  Now I love the color lavender and am already planning on using it in more of my work.  Thank you Louise for that!  What I realize is that I could probably use any color in my work, as long as I learn how to make it "Esther".

 I also am realizing that plaster or molding paste is one of my favorite things to use.  I've used it many times like on this piece here, and on my sister's 3 other pieces (which I still have to share with you), and I really feel like that's the way my artwork is going to keep heading.  I had a blast creating this piece and want to make many more like it.  And using plaster takes me back to my favorite finishes from my faux-finishing days, so whenever I miss it, I could just whip out a very large canvas and get plastering!

Wednesday, September 1, 2010

Painting: Flowers and Swirls

24x40
I painted this for my sis and her hubby a few weeks back while we were visiting them up in Oregon.  I've been wanting to make them something since they got married (4 years ago...oops..sorry guys), so I finally did it!  I drew my inspiration for the painting from this gorgeous pillow my sis bought from Anthropologie .

 Oh, and most of these pictures were taken by my sister, who thinks she isn't creative...do you see this photo of the pillow...with the light and shadows and stuff...WOW!!  Impressive, right?  Face it Beth...you rock!  Without her I wouldn't have any pictures of the finished painting, I only was able to take pics of the beginning stages, so thanks sis!


I started this on our first morning there.  I had only taken a few art supplies with me because I didn't know if I'd actually work on something while there, and figured if I did, I would just go buy what I needed.  They were out of town that day and we didn't have access to a car, so my husband and I raided their garage to see what I could use.  I love a good challenge!  We found this 1/4"thick plywood, so my husband cut it, then I drew out a sketch onto it.  I then found some wall paint that they used inside their house, and started to paint my base.  I wanted the swirls to be formed from the bare wood showing, because it had such a nice, rich feel to it, and it would make it a bit more masculine and modern so my bro-in-law would like it too (hopefully).


My son was helping me decide where to put the final swirl.


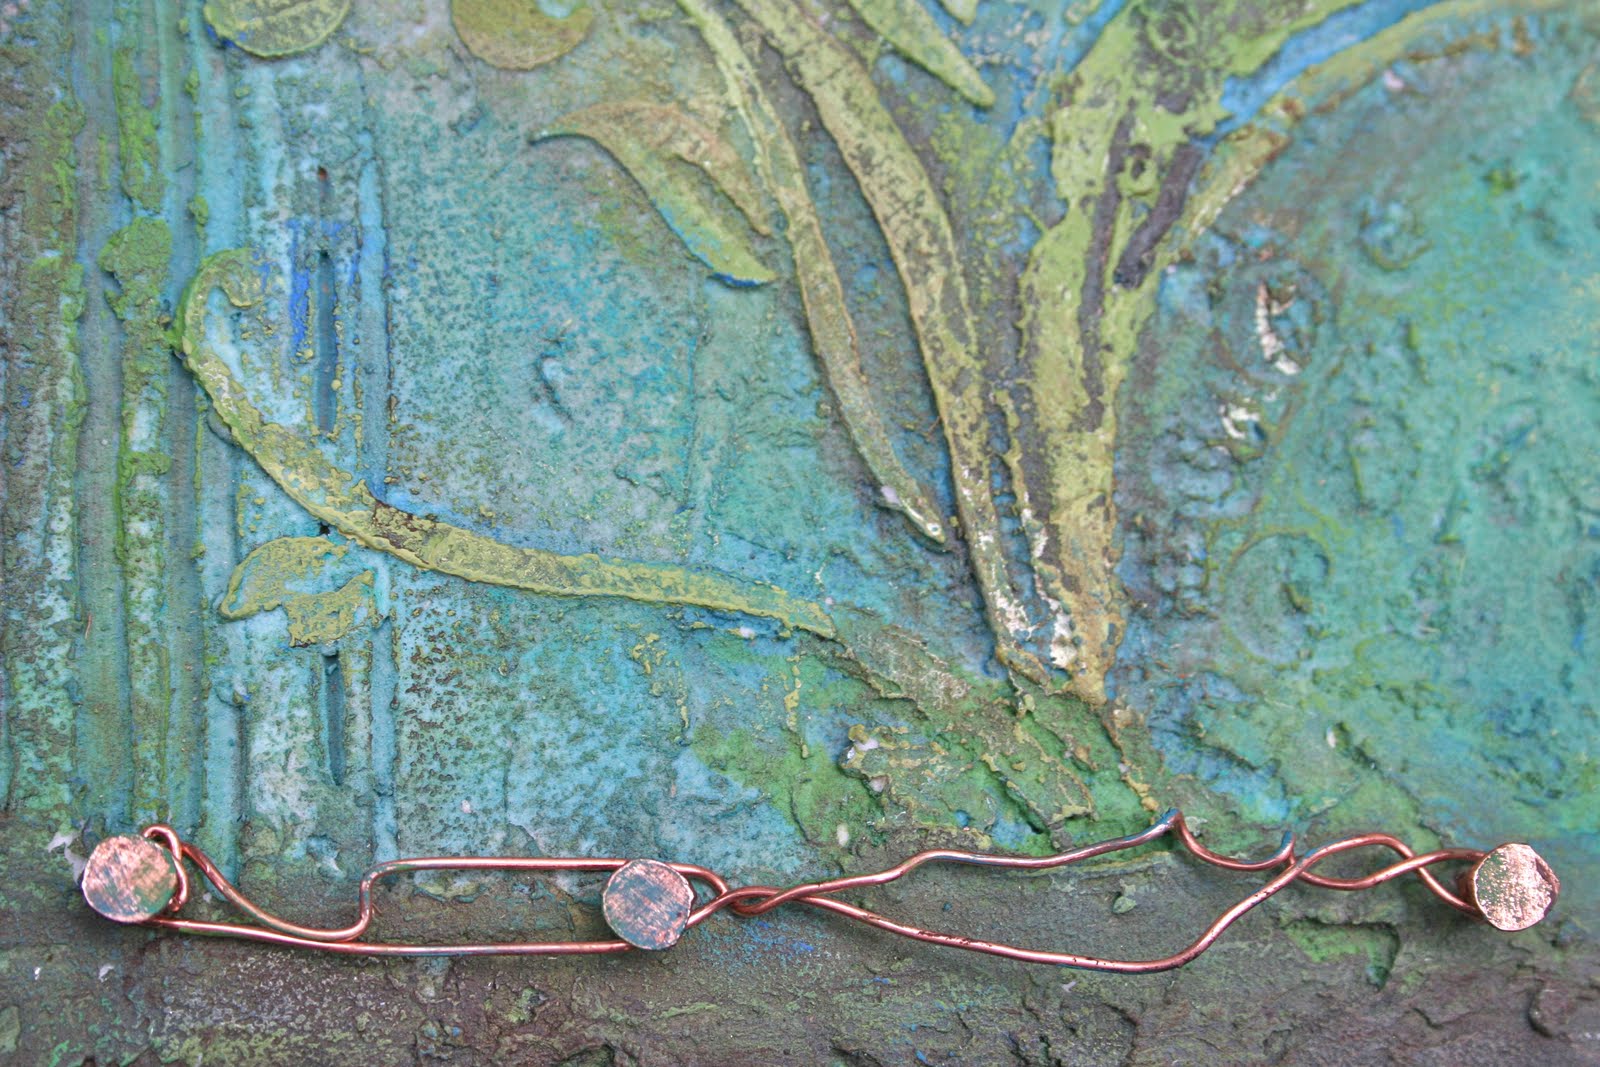
After the main background was done I got a foam stamp that I had packed on a whim, and brushed the same paint on it thickly and stamped it randomly onto the painting.  I put the paint on thick enough to leave a nice raised pattern when stamped. 


The second day I worked on it, I started with a few washes of color, then used a pretty stencil that reminded me of the background pattern on the pillow (at this point we had finally gone to my favorite lil art store "Collage" in Portland to buy some much needed, fun supplies, and that's where the stencil came from). 


 Here is a close-up of the pillow so you can see the cool pattern on it.

The final day that I worked on the painting, I added a few sprays of flowers.  I did this by getting a stamp I had just bought (yay) and colored on it with a brownish water-soluable (WS) crayon, then wet it and stamped it on to form the flowers.  Then I got a green WS crayon and drew out the stems and leaves.  I then took a brush and wet the leaves and stems to soften and blend them.


I sanded some areas to distress it and to bring out the original thick stamped pattern, then I brushed on a raw umber glaze to antique it and bring out the wood tones.  My husband built a little frame behind it and mounted it so it is flush up against the edges to make it more sturdy, and make it look  like a thicker piece of wood from the side.  I then painted over the edges with the raw umber (brown) paint.  

I've never worked on a canvas this big (well, except for walls...but that's different), and I've really been wanting to, so this was a lot of fun for me, and quite a challenge.  I didn't plan the painting that much, I just let it happen, and a lot of the time I didn't know what would come next.  There were many times when I thought I had bit off more than I could chew, because I didn't know how I would finish it, but there was always an idea in the back of my mind telling me the next step.  If I didn't doubt that voice, this would've gotten done a lot sooner... but then they wouldn't have the other 3 pieces I made the day I was avoiding finishing this!  I'll explain later, along with pics of those pieces.

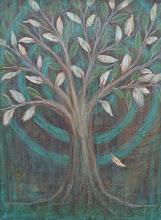
 I really like how this turned out.  It's a different style for me, and I like it.  It's amazing what limited supplies, a pretty view, a nice challenge and a bit of creativity will do!